Think about a case of going for a ride with great breezes; suddenly, a flat tire disrupts the journey. Instead of ruining your mood, let’s explore simple instructions for using a tire changer that won’t require expert skills or waste time. This article will explain how to use a tire changer correctly, starting with proper installation and ending with appropriate usage.
Understanding About The Tire Changer:
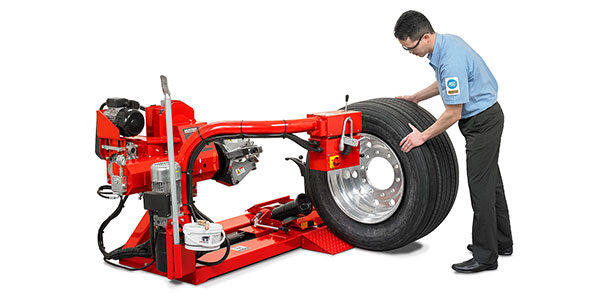
Before utilizing a tire changer, enlighten yourself with the essential equipment. A tire changer is a machine used to help tire mechanics remove and mount tires with automobile wheels. After the wheel and tire assembly are removed from the automobile, the tire changer has all the parts necessary to remove and substitute the tire from the wheel.
Types of Tire Changers:
Firstly, not all tire changers are identical. You’ll meet two main types:
· Manual Tire Changers:
Manual tire changers require much more effort but are perfect for a small garage examining to service tires sometimes. They are bought mainly by beginners and garage owners and are a more economical alternative to the current tire changers in the industry today.
· Automatic Tire Changers:
These are operated in automobile industries for changing tires of vehicles efficiently. The machine is well connected with a bead remover cylinder, rim clamping system, seal ring & piston, and semi-automatic side swing arm.
Also Read: A Deep Dive into the Best Places to Purchase Used Tires in the USA
Step-by-Step Guide About Tire Changers:
· Preparation:
Set the parking brake and park the automobile in a safe location. Begin by releasing the lug nuts on the replacement wheel. Place a tire changer in an easily accessible place.
· Bead Breaking:
Break off the bead seal from each side of the tire using the bead breaker. This is when the loosening of the tire from the wheel begins.
· Tire Installation:
Place the tire on mounting equipment. Minimize friction between the tire and wheel by lubricating the tire beads. Mount the tire using the mounting arm on it.
· Inflation:
Inflate your tires to the correct PSI once you have mounted them. Inspect the tire and look at other irregularities that may indicate it was not correctly seated. Then, start pumping in additional air.
· Closing Touches:
Install the lug nuts onto the new tire, detach the wheel from the tire changer, and re-torque the lug nuts to confirm that the tightening has held the wheel properly. Take care while lowering the car and torque the lug nuts. Check if it is tight again after taking a short drive around.
Conclusion:
Understanding the basics of using a tire changer can be highly beneficial, especially during unexpected situations on the road. However, for a seamless and hassle-free experience, empowering your tire needs to professionals like Zee’s Tire Shop assures quality service and peace of mind. We provide total tire services involving tire fitting, balance, and alignment. Our commitment to offer quality and timely assistance will help you get your vehicle back on the road.




Leave a Reply